

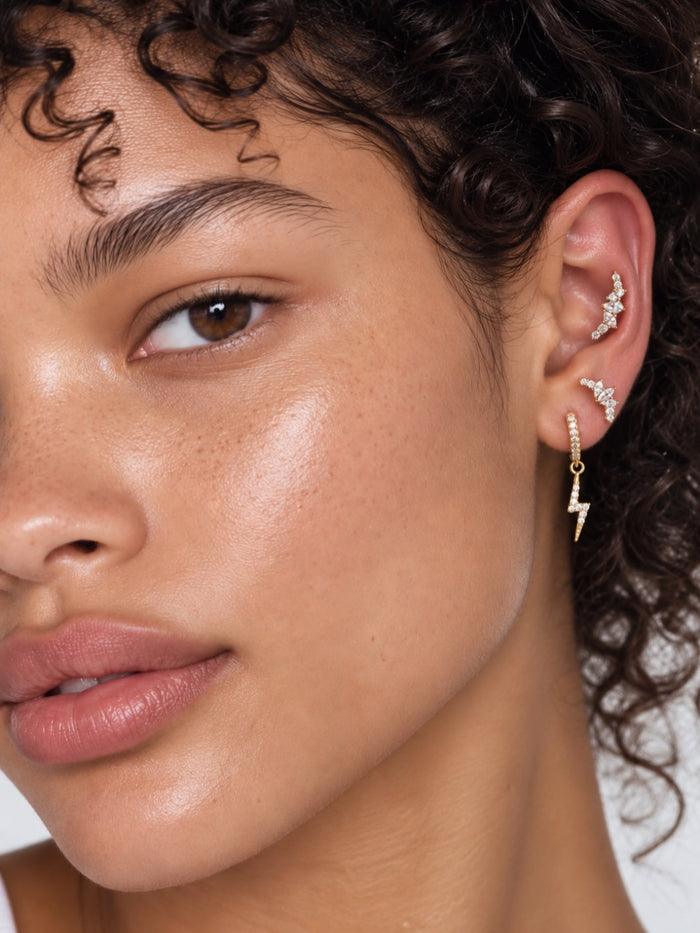
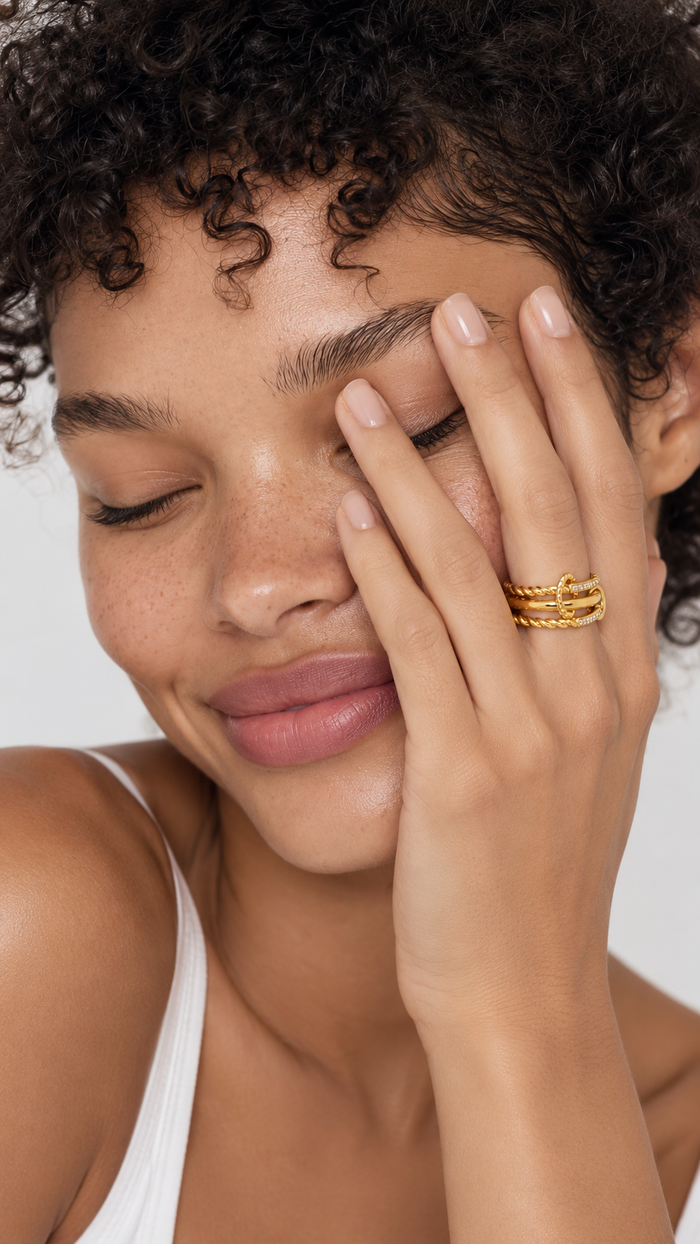


The GA Guide / Ear cuffs
How to Wear
Ear Cuffs
A little detail higher up.
No extra piercing required.
Find the fit, learn the placement and build an ear story around the pieces you love. With eighteen looks to borrow from.
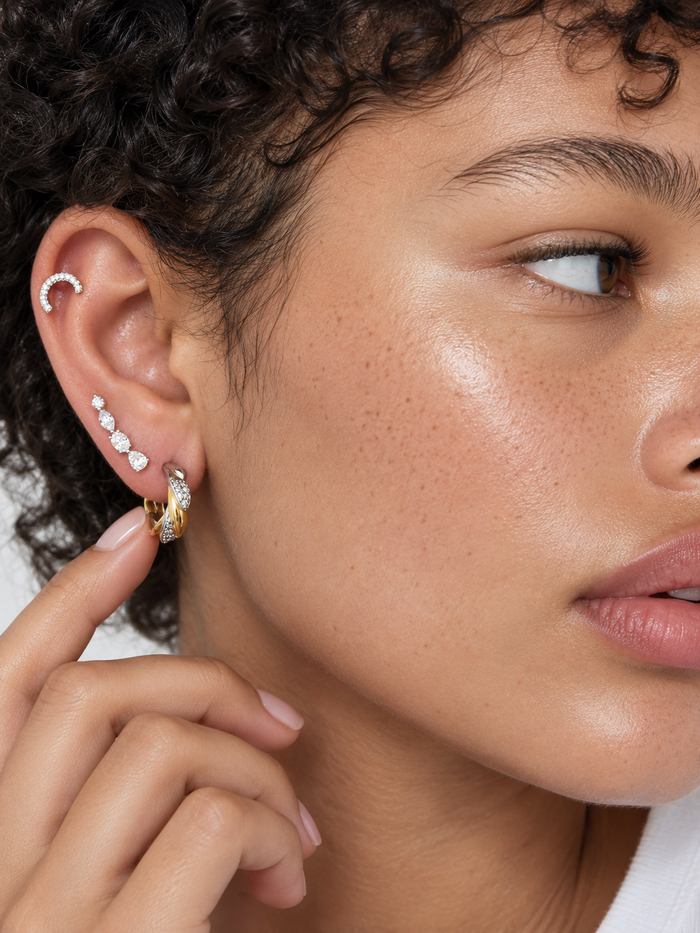
Learn the fit Explore the looksPhotographed: Double the Stud, Double the Cuff. The cuffs are styling inspiration; shop the current linked pieces on the look page.
01 / The short answer
What is an ear cuff?
An ear cuff sits around the outer edge of your ear without a post passing through a piercing. It can add a detail above the lobe on its own, or join the studs and hoops you already wear. The right position depends on the cuff’s shape and your ear.
For a typical open cuff, find the narrow part of the outer rim where the gap passes comfortably, slide it into position and check that it rests securely without pinching. A hinged cuff opens and closes at its hinge. Always follow the instructions for your particular design.
- The cuff
- No piercing
- The fit
- Secure, not tight
- The styling
- One or layered
Ear cuffs, huggies and climbers.
A huggie is a small hoop with a post for a piercing. An ear climber usually has a post too, even when its shape travels along the ear. A no-piercing cuff rests around the ear instead. Check the fastening rather than judging by the photograph.
Start with what you have.
No piercings? Wear a cuff alone. One lobe piercing? Pair it with a stud or hoop. Several healed piercings? Use the cuff as one detail in the composition, leaving enough space for each piece.
Explore the ear cuffs collection02 / Fit comes first
How to put on an ear cuff,
step by step.
Start in front of a mirror, over a soft surface. The aim is a comfortable resting place, not the tightest possible grip.
-
01
Check the fastening.
Identify a fixed opening, an adjustable cuff or a hinge. Do not pull a rigid design apart. A cuff that opens on a hinge is not necessarily meant to bend.
-
02
Clear the space.
Move hair away and check that your skin and the jewellery are clean and dry. Keep the cuff away from irritated skin and healing piercings.
-
03
Find the entry point.
For an open cuff, locate a narrow part of the outer rim where its gap passes without force. Support the ear gently. For a hinged style, open the mechanism as directed.
-
04
Move it into place.
Guide the cuff to the part of the rim its shape is designed to surround. The direction varies by design. Close a hinged cuff carefully, keeping skin clear of the fastening.
-
05
Check the pressure.
The cuff should stay in place without squeezing, aching or digging in. Only adjust the opening if the maker says it is adjustable, and avoid repeated bending.
-
06
Try normal movement.
Turn your head and check it beside glasses, hair and other earrings. If it slips or presses, remove it and reconsider the position or fit before wearing it out.
Which type do you have?
| Cuff type | How it goes on | What to check |
|---|---|---|
| Open, fixed-gap cuff | Slide through a suitable narrow point of the outer rim. | The gap and inner shape must suit your ear. Do not force it open. |
| Adjustable open cuff | Position it first; make only the small adjustment allowed by its instructions. | Avoid bending it back and forth each time you wear it. |
| Hinged cuff | Open the hinge, position the cuff and close its fastening. | Keep skin clear. A closed clasp does not guarantee a good fit. |
| Cuff with a chain or attachment | Check every attachment before putting it on. | Some designs connect to a pierced earring. Leave enough slack so the chain does not pull. |
How to remove an ear cuff.
Support the cuff and return an open design to the narrow entry point, then ease it off through the gap. Open a hinged design using its fastening. Do not pull it straight across a thicker part of the ear or tug on an attached chain.
03 / Small adjustments
Slipping, pinching
or feeling crowded?
It keeps sliding off.
Check that the shape and opening suit the position. Try another position only if the design allows it. If it still slips, choose a different size or shape; squeezing harder is not the answer.
It pinches or aches.
Take it off. The fit should not depend on discomfort, and wearing it longer will not make a too-tight cuff suitable. Check the intended position and adjustability before trying again.
Your ear is small.
Look at the opening and inner dimensions, not just the cuff’s outside size. A smaller or lighter design may suit you better, but no single measurement fits every ear.
It touches another earring.
Leave a gap, simplify the stack or choose a different cuff position. Jewellery should not push another piece into the skin or trap a moving charm.
Glasses or hair catch it.
Test the combination while putting your glasses on and moving your hair. Remove the cuff before pulling a tight top over your head.
The sides fit differently.
Your ears need not be identical. Try each side independently, and check whether the cuff is designed for a particular left or right ear.
A cuff is an optional detail. If it will not sit comfortably and securely, leave it off rather than forcing the fit.
04 / Build your ear story
How to style an ear cuff.
- Pick one focal point. A larger hoop, a moving charm or the cuff itself can lead the look. Give that piece some space.
- Vary the scale. Try a smaller cuff with a fuller lobe hoop, or a more decorative cuff with a simple stud.
- Repeat one detail. A metal tone, stone colour or curved shape can connect pieces that do not match.
- Use the piercings you already have. Copy the balance of a photograph rather than every placement. The pierced earrings shown below need suitable healed piercings.
- Check the whole ear. Turn sideways in the mirror. Keep chains free, drops moving and the cuff clear of neighbouring jewellery.
One cuff on one ear is enough. Two can work when both sit comfortably with space between them; matching ears are optional. For more combinations, explore our Ear Stories collection.
05 / From The Looks
Eighteen ways
to make it yours.
Choose a photograph for its proportions, then shop the current pieces linked beneath it. Open each look page to choose options and select the items you want.
Some photographs include cuffs or older pieces that are no longer listed. The links show the current shopping options, which may not recreate every detail pictured. Our ear cuffs collection includes the remaining selection; availability and sale prices can change.
Studs, hoops, huggies and ear climbers in these looks require piercings. A cuff can add a separate detail without an extra piercing. Check whether each product is sold singly or as a pair, and choose the correct left/right option where offered.
The Looks / Three ideas
Start with the cuff.
Three photographed ways to balance a cuff with lobe earrings. The cuffs shown are styling inspiration; use the ear cuffs collection to see the current selection.
Borrow the balance
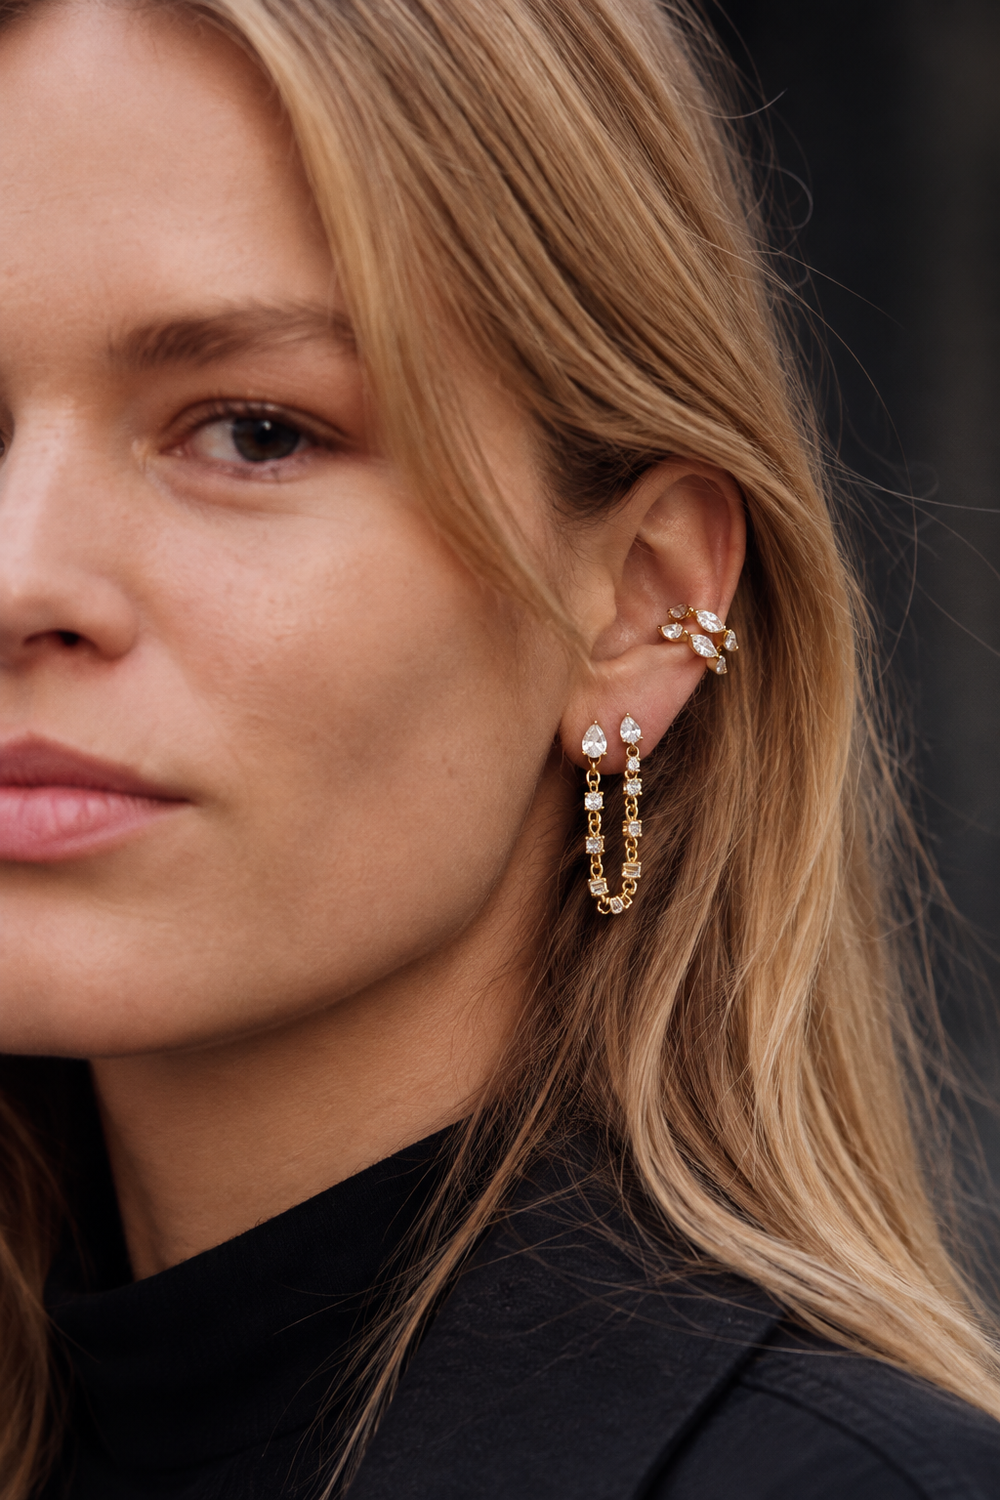
Double the Stud, Double the Cuff
Repeat a shape instead of adding lots of different ones. Rosie connects two lobe piercings with a crystal-set chain; the paired cuffs in the photograph carry the repetition upwards.
Shop the current pieces
Rosie needs two suitable piercings. The photographed cuffs are not included in the linked product.
Borrow the balance
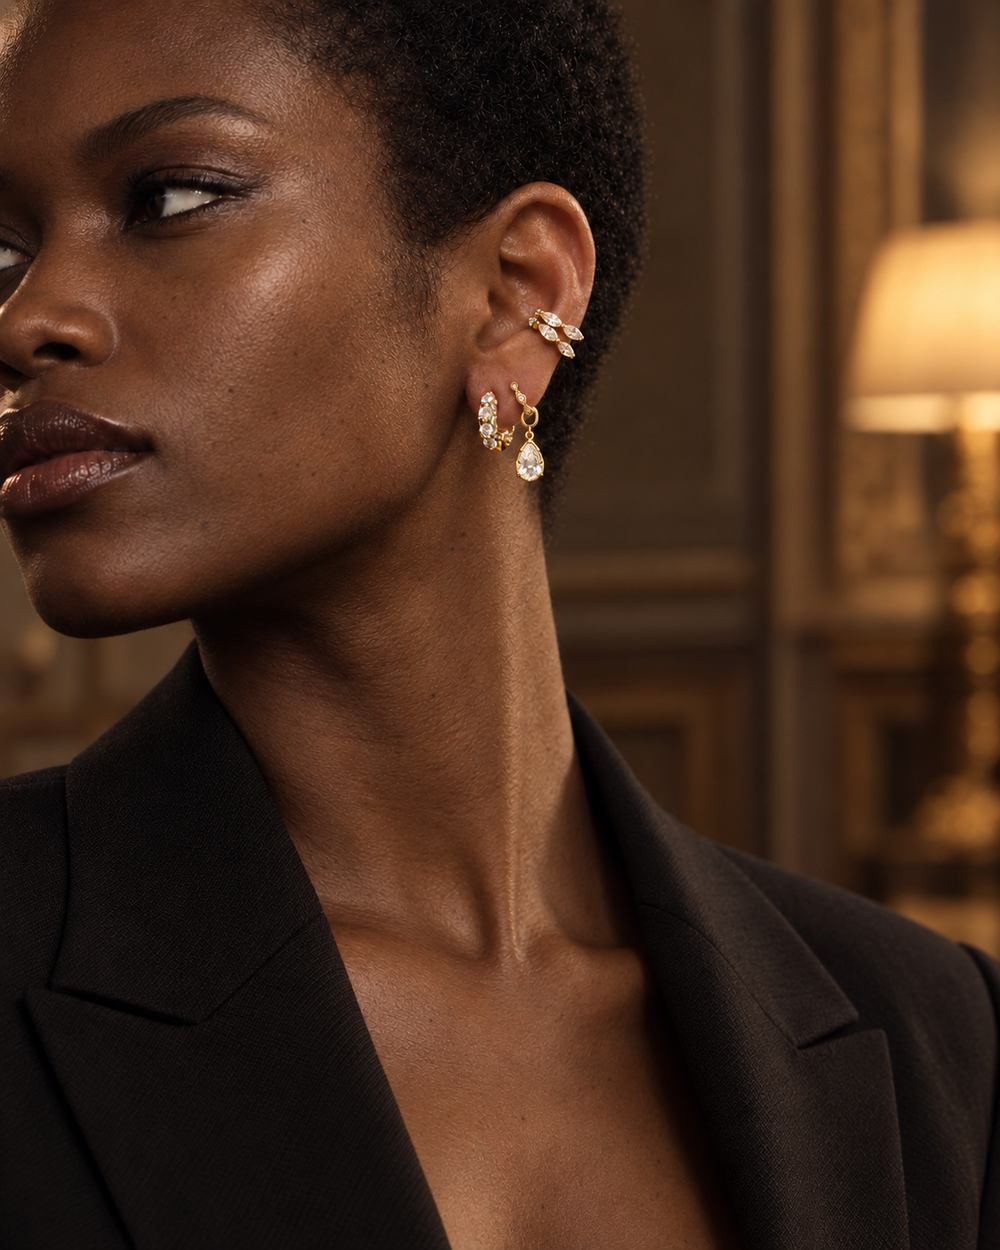
Second Piercing, Just Add Ear Cuffs
Borrow the balance: a bright drop at the lobe, a smaller neighbour and a cuff above. The currently linked Tasha and Vittoria combination gives you a gold teardrop starting point.
Shop the current pieces
The current gold charm combination differs from the darker charm in the photograph. The pictured cuffs are styling inspiration.
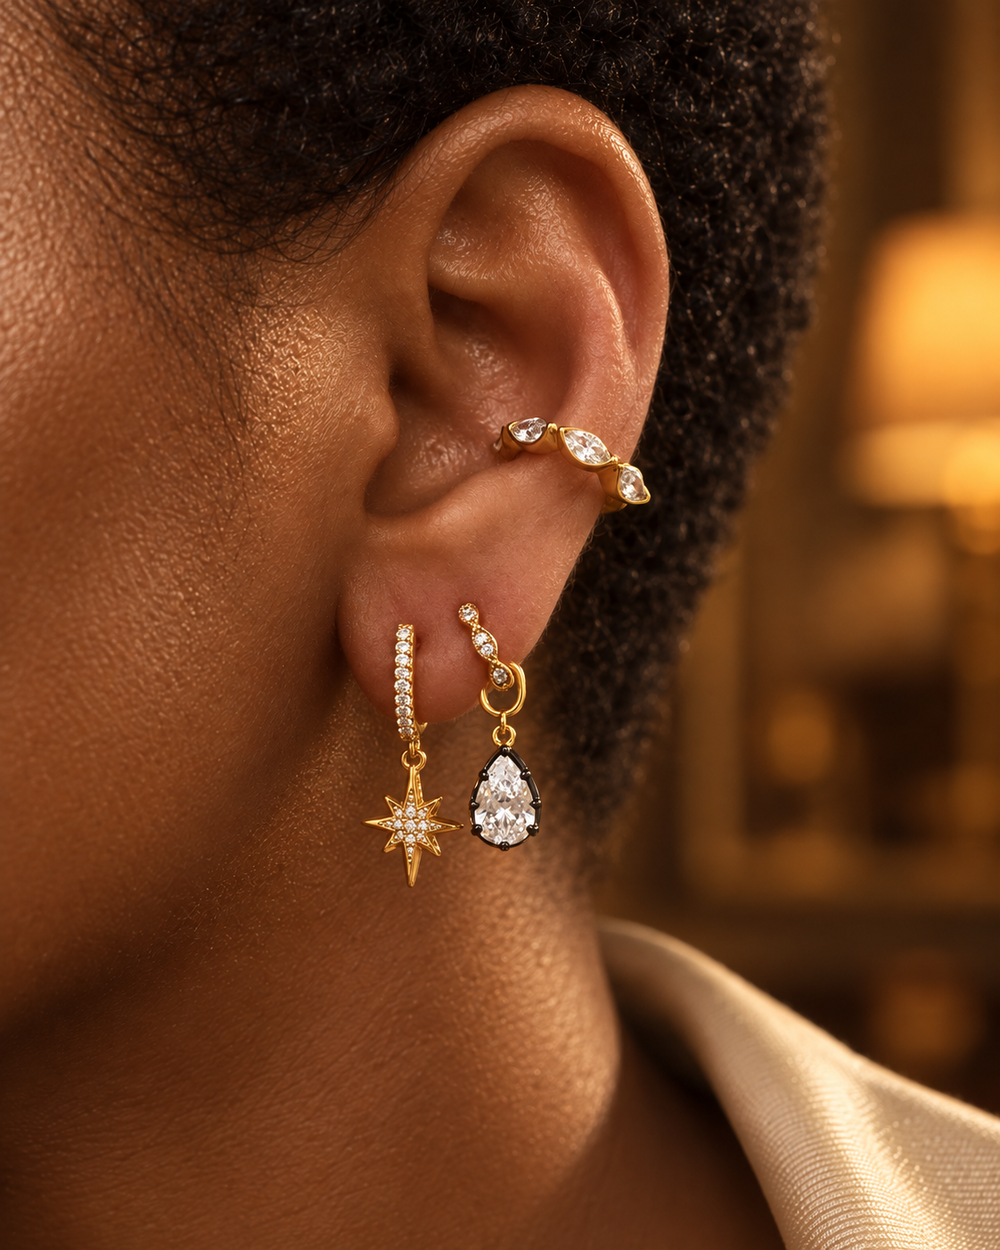
Borrow the balance
Second Piercing Ideas — Star & Teardrop
Give two lobe piercings different characters: a starburst and a teardrop. A cuff can repeat the gold tone higher up while the drops stay free to move.
Shop the current pieces
The photographed marquise cuff is not included. Shop the two current drop earrings below.
Find your cuff
The current
ear cuffs edit.
Already have a cuff? Use it with a new lobe combination from the looks above. Looking for one? Browse the collection for the remaining styles, including sale pieces, and check each product’s fastening and dimensions.
Shop ear cuffsThe Looks / Three ideas
Small pieces. A clear shape.
Build from the piercings you already have. Use a small stud, a teardrop or a repeated oval shape, then leave space for a cuff if it fits comfortably.
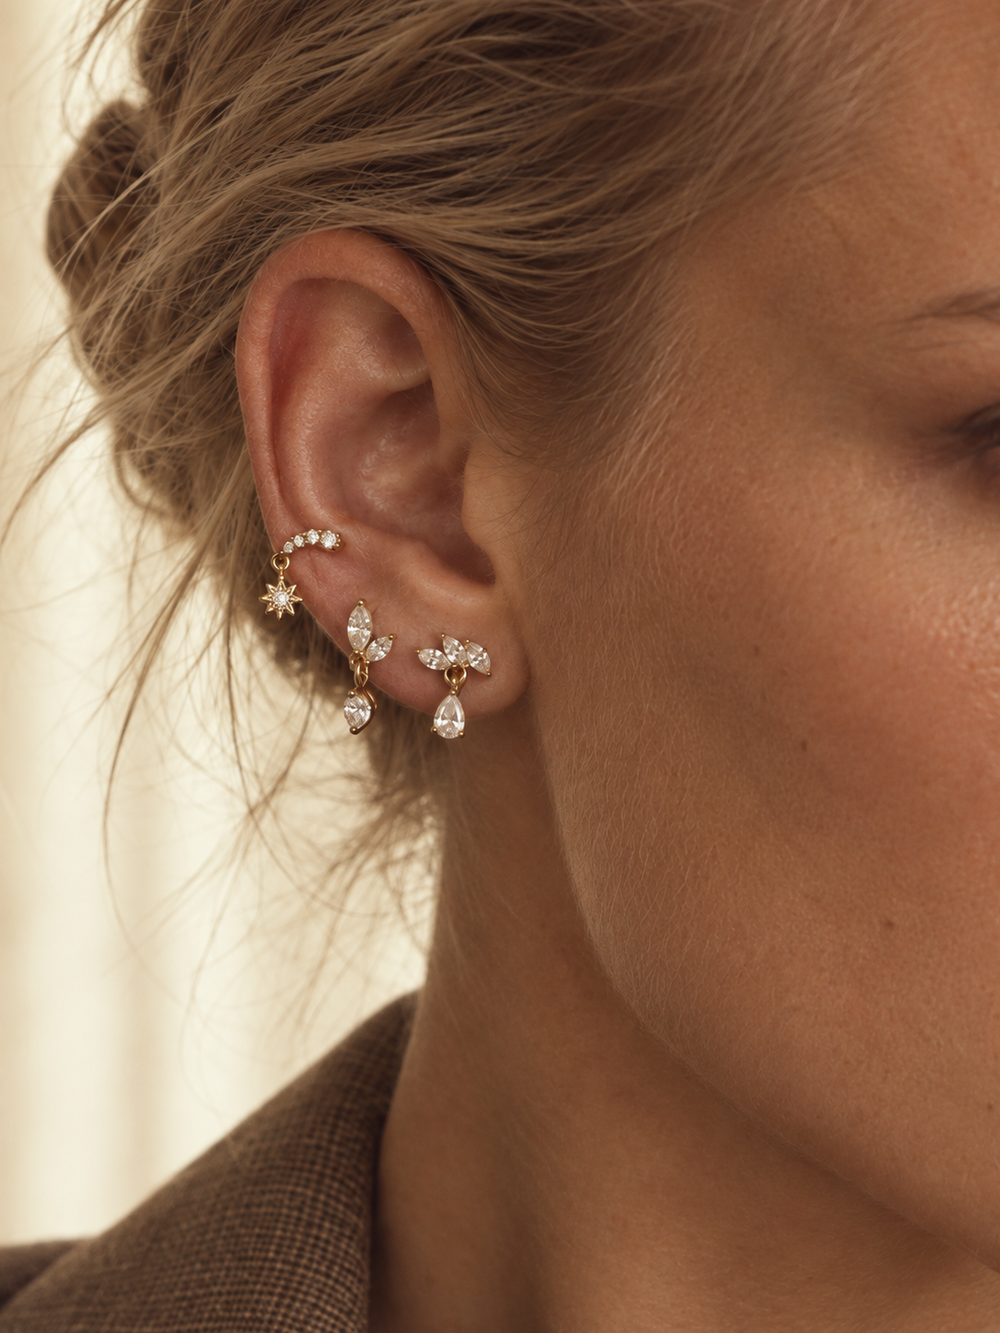
Borrow the balance
The All Studs Ear Story
Mix small floral, pear and marquise shapes while keeping the gold tone consistent. To add a cuff, leave one area of the outer ear clear rather than crowding every placement.
Shop the current pieces
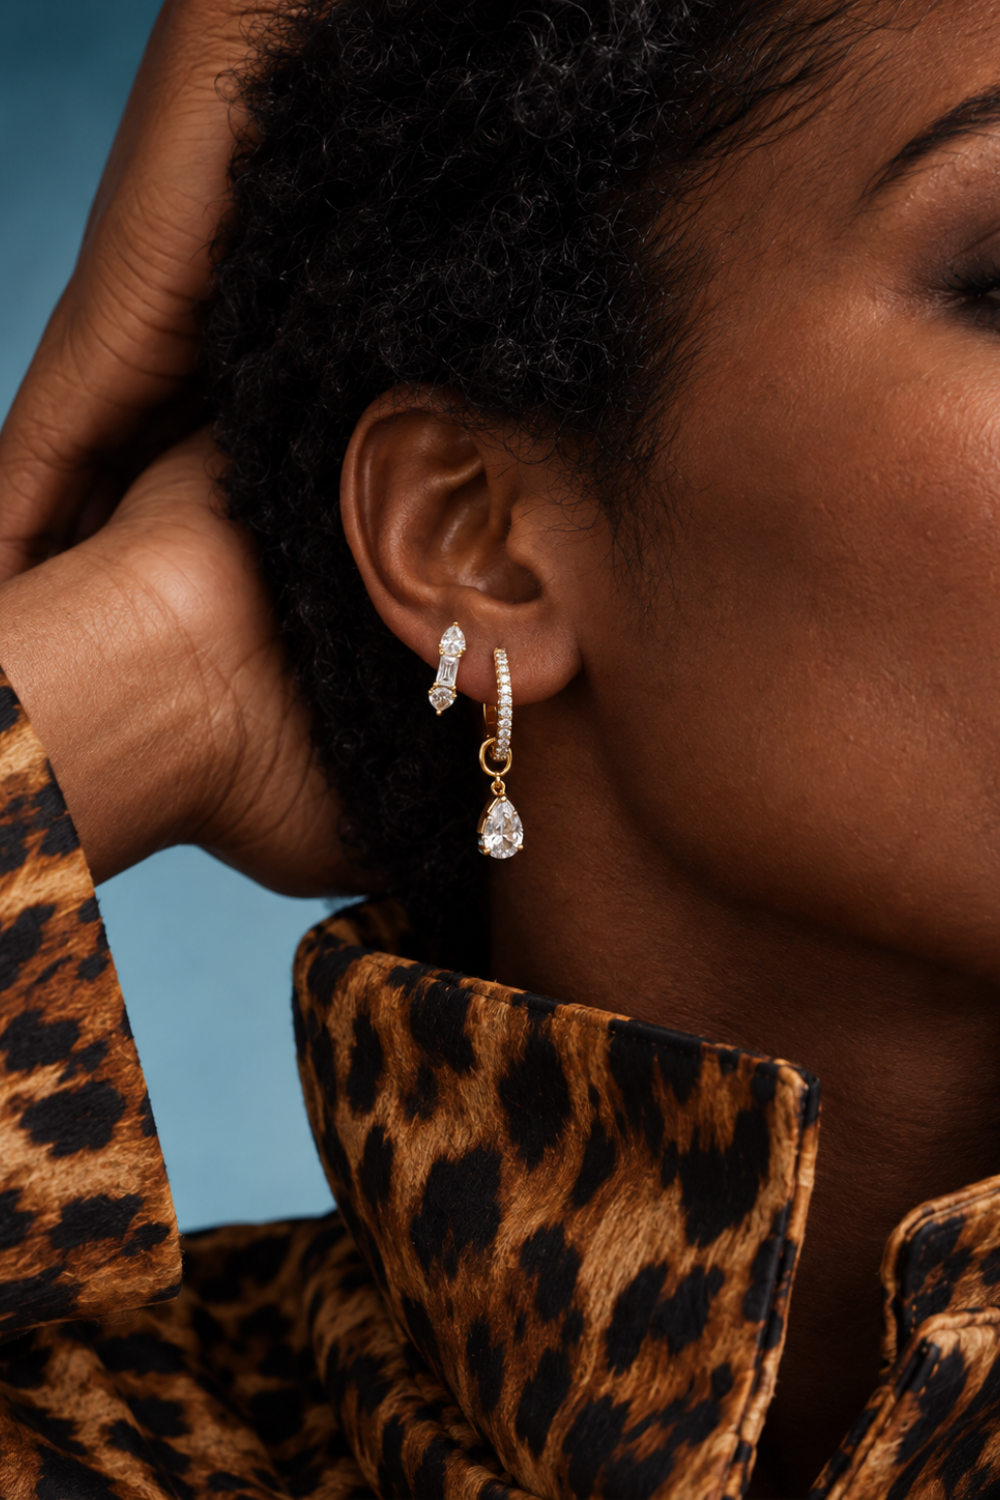
Borrow the balance
A Vittoria Moment
Let a teardrop be the focal point. The current 11 mm huggie and Vittoria charm create the moving lobe detail; a simple cuff would keep the upper ear quieter.
Shop the current pieces
The shop links cover the huggie and charm. The coordinating stud in the photograph is not included.
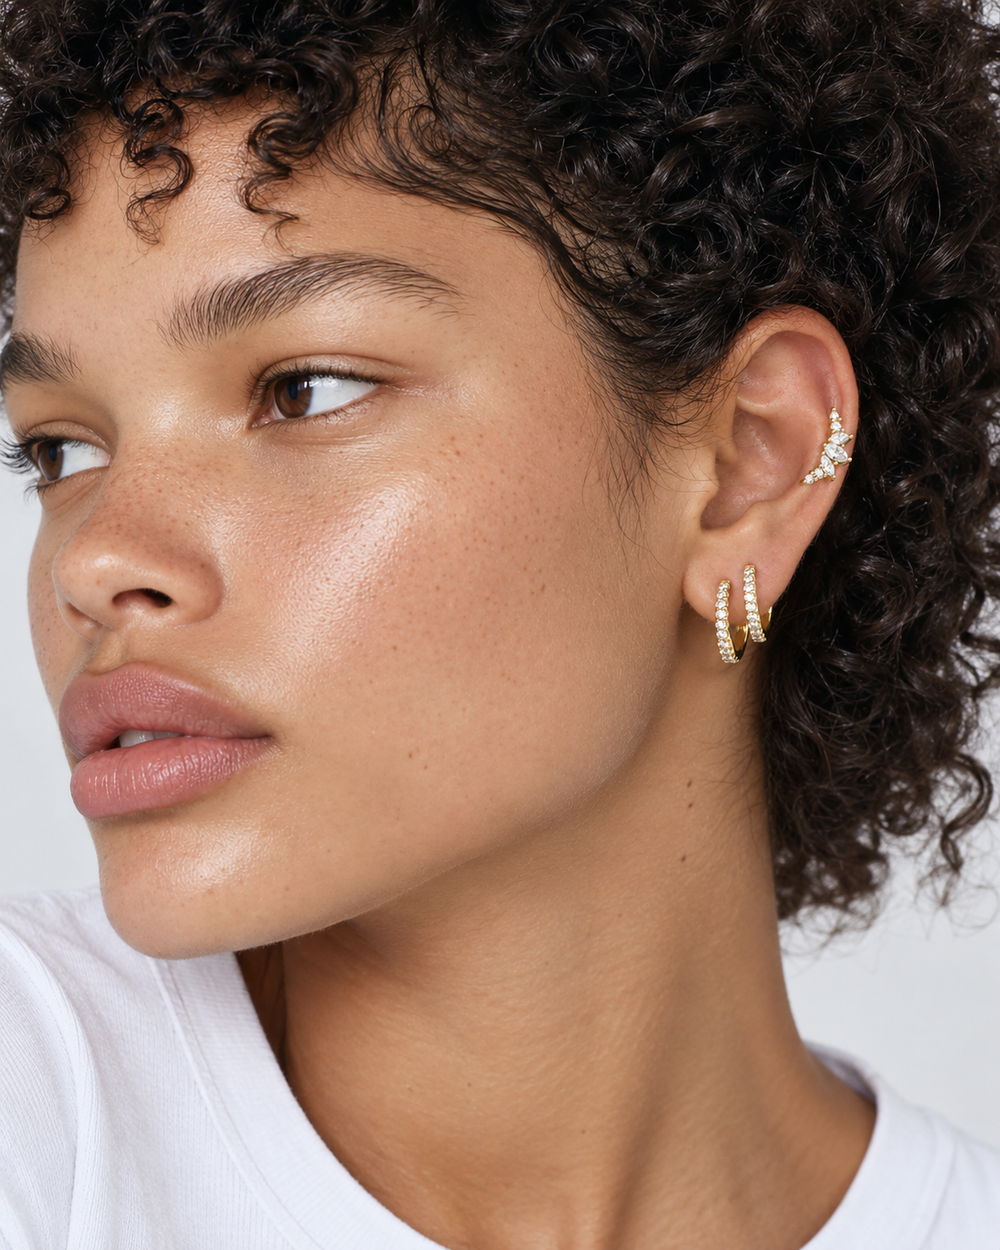
Borrow the balance
Two Oval Huggies and Couronne
Repeat an oval at the first and second lobe, then add a small crystal detail. For a cuff variation, keep the lobe pair and choose a comfortable cuff position of your own.
Shop the current pieces
The photographed Couronne is a pierced stud, not a cuff. The look uses two oval huggies.
The Looks / Three ideas
Let the hoop lead.
One stronger shape at the lobe gives the ear a focal point. Keep a cuff simpler when the hoop already brings volume or sparkle.
Borrow the balance
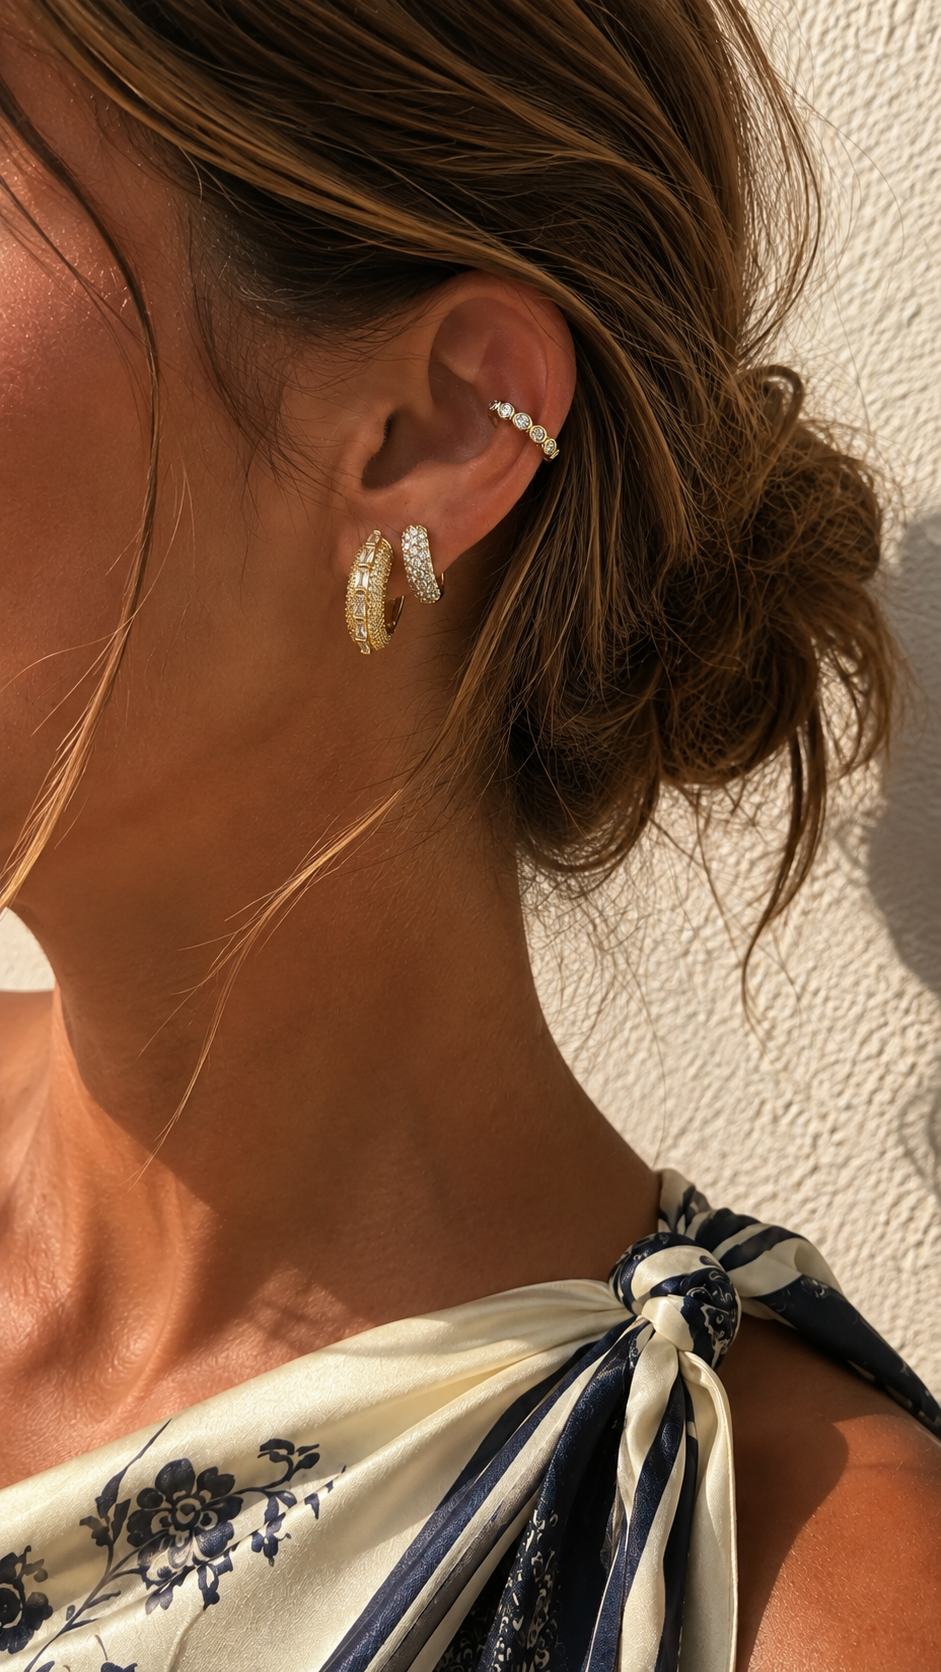
The Golden Hoop Stack
Build a gold ear around different hoop textures: a larger pavé shape, a smaller huggie and a fine inner-ear detail. Borrow the change in scale when choosing a cuff.
Shop the current pieces
The pictured closed hoops and huggies require suitable piercings.
Borrow the balance
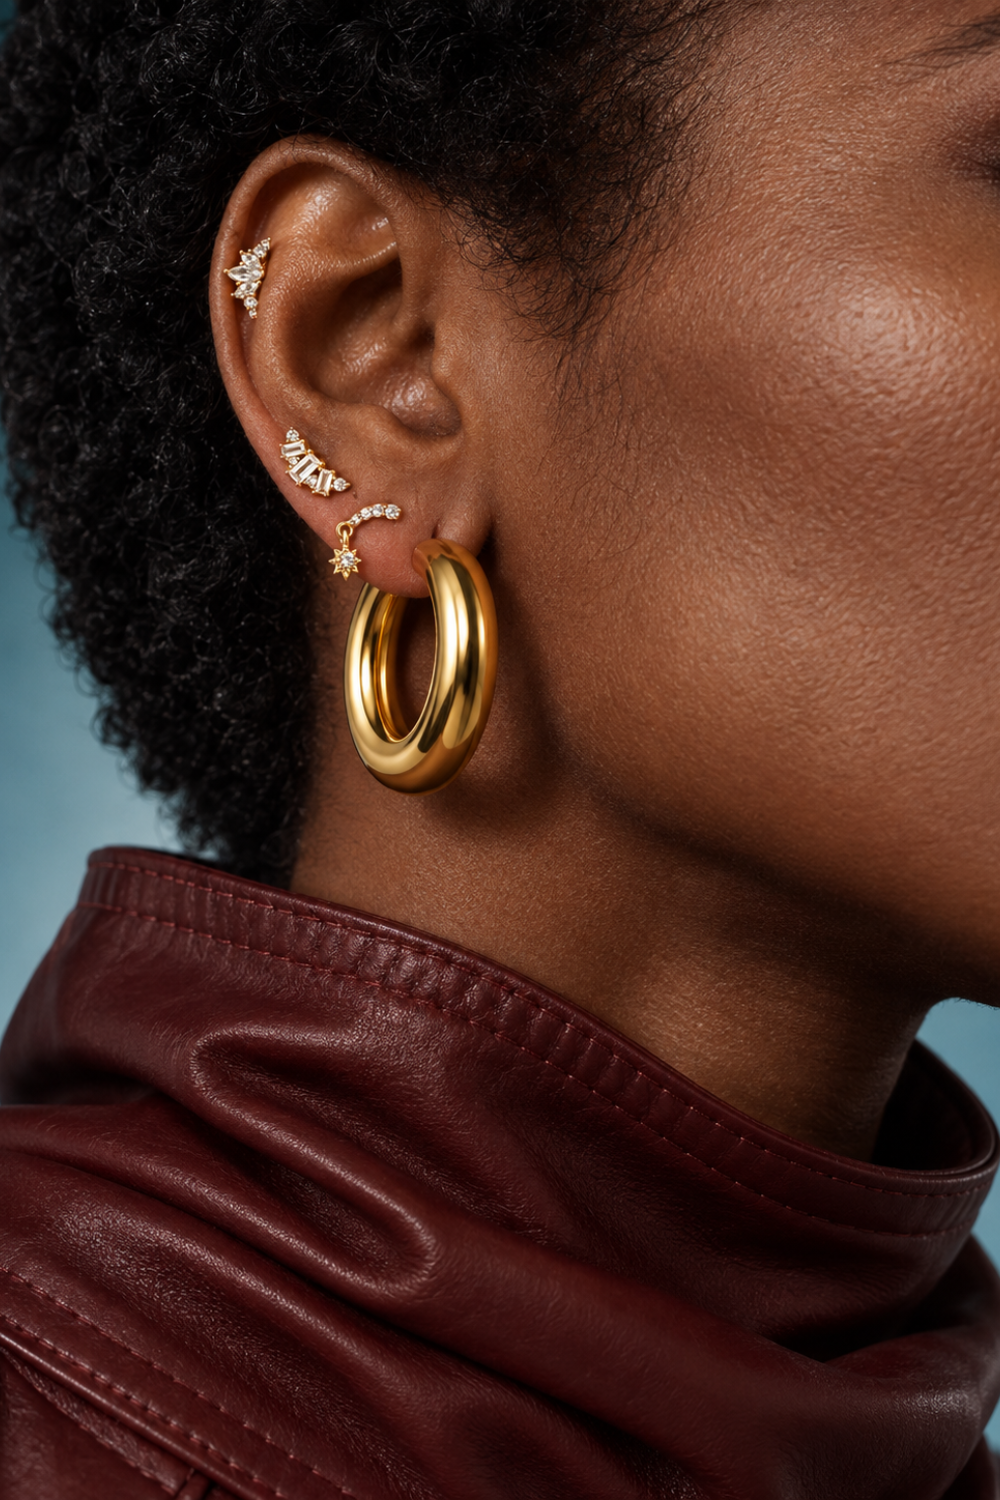
The Gaga & Stud Friends Ear Story
Give Gaga the space to lead. The smaller studs add light around the main hoop; if you add a cuff, keep its shape simple and check that it does not touch the nearby jewellery.
Shop the current pieces
Borrow the balance
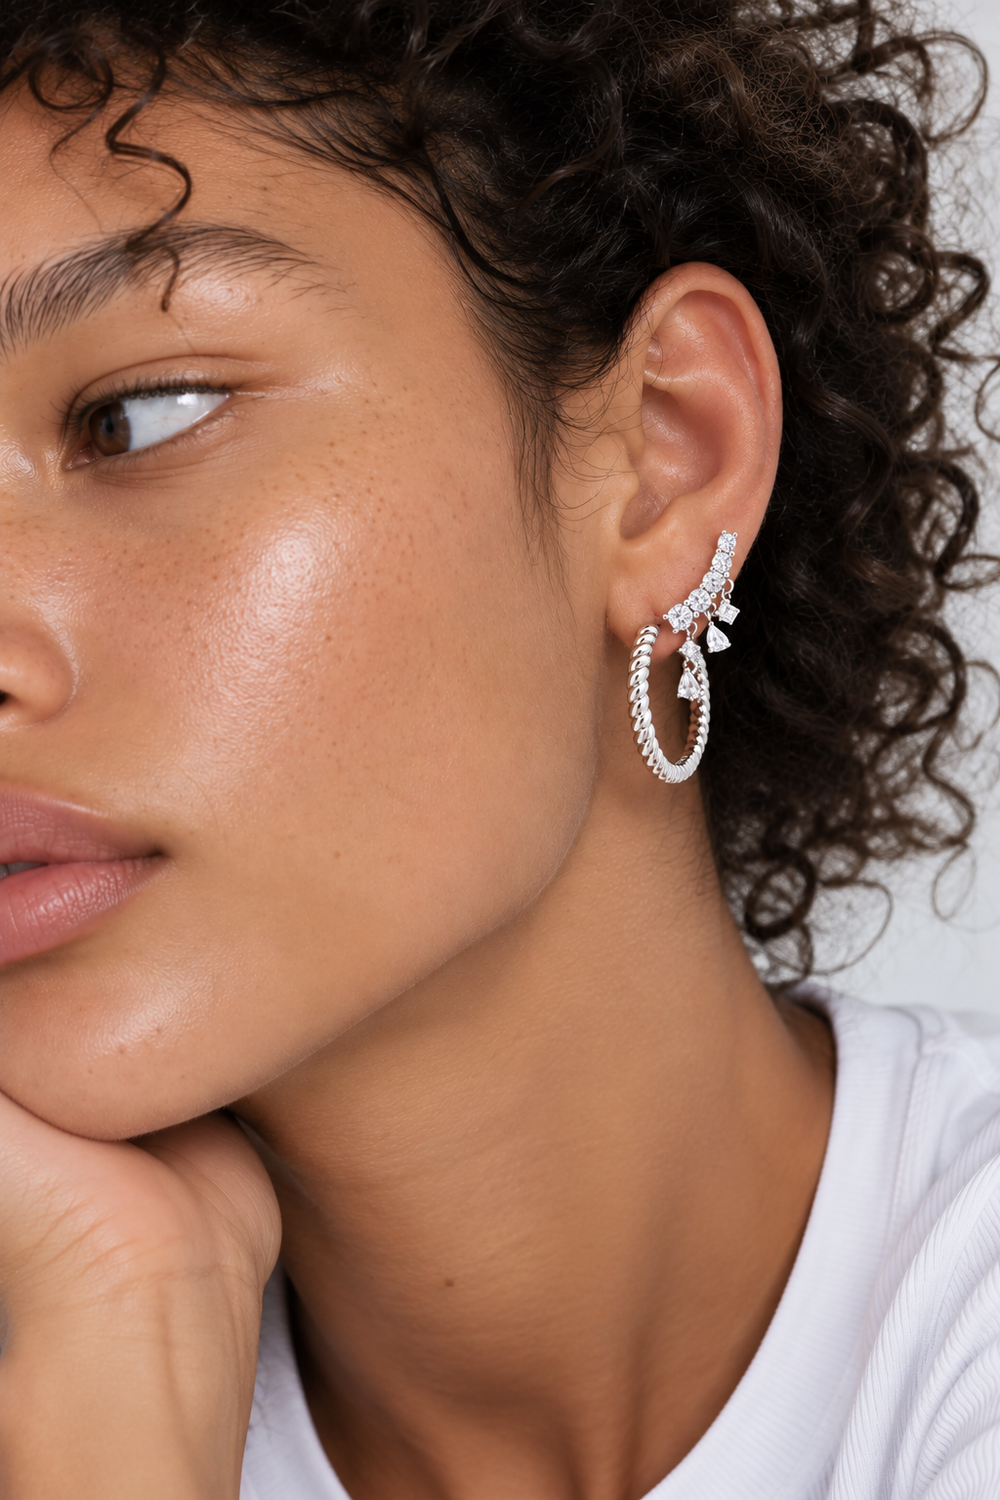
Speira 18 mm & DrIppy Croissant
Pair a sculptural silver hoop with a crystal-set curve. A small silver-toned cuff can echo the finish without competing with the lobe details.
Shop the current pieces
Choose the correct left or right Drippy Croissant option.
The Looks / Three ideas
Gold, silver. Both.
Repeat a finish somewhere else in the ear to connect the contrast. A cuff can echo either colour; it does not have to match every earring.
Borrow the balance
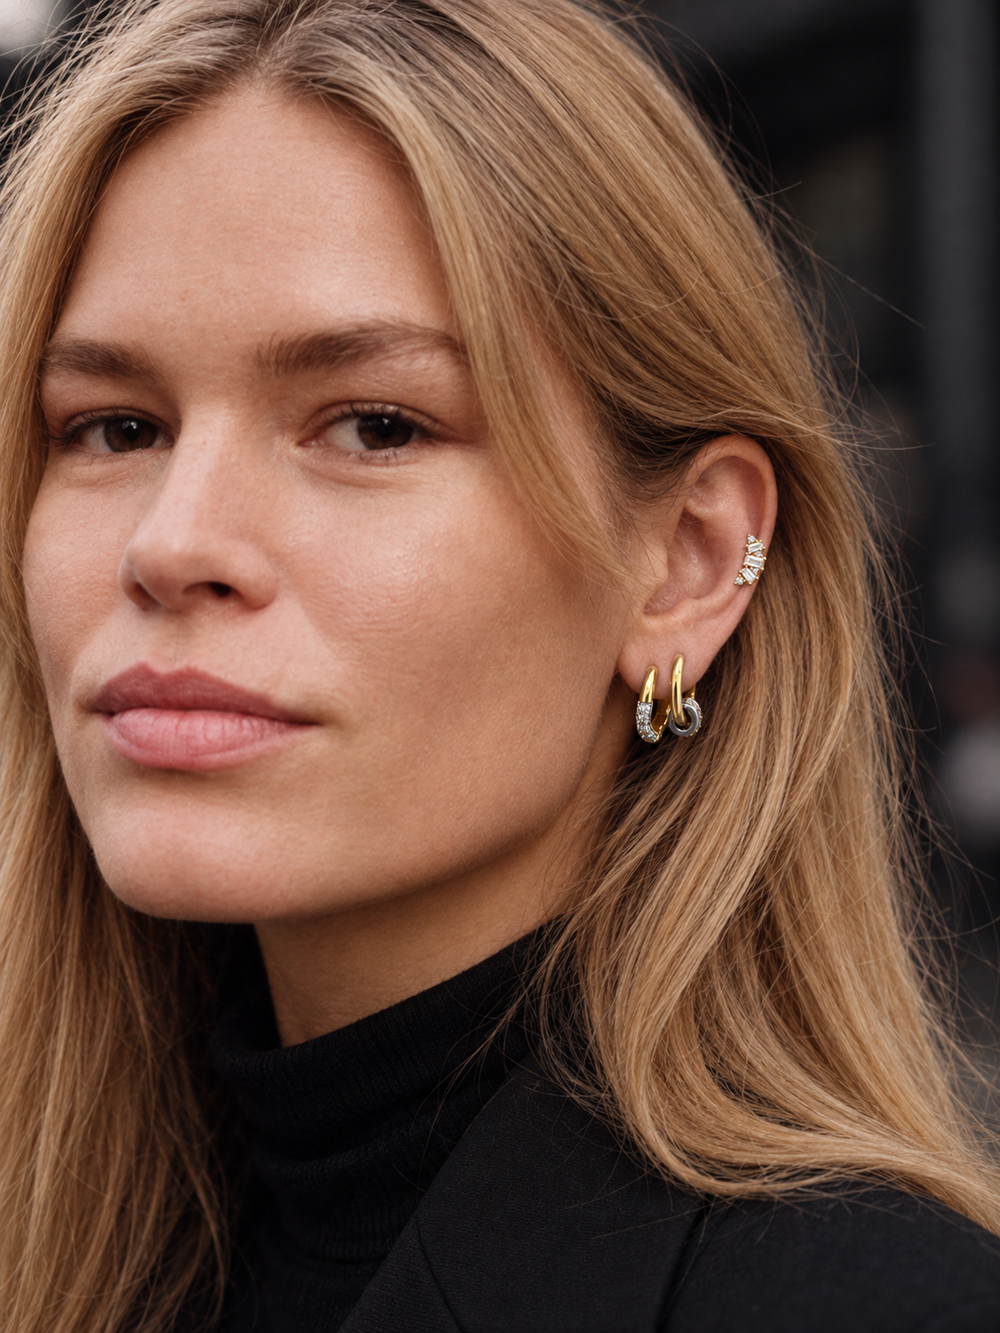
Simple Two-Tone with Lumière on the Helix
Use a two-tone huggie to connect warm and cool finishes. Lumière adds a fine line of sparkle; a cuff can offer a different upper-ear detail if you do not have that piercing.
Shop the current pieces
The Lumière shown on the helix is a pierced stud. A cuff would be a separate styling choice.
Borrow the balance
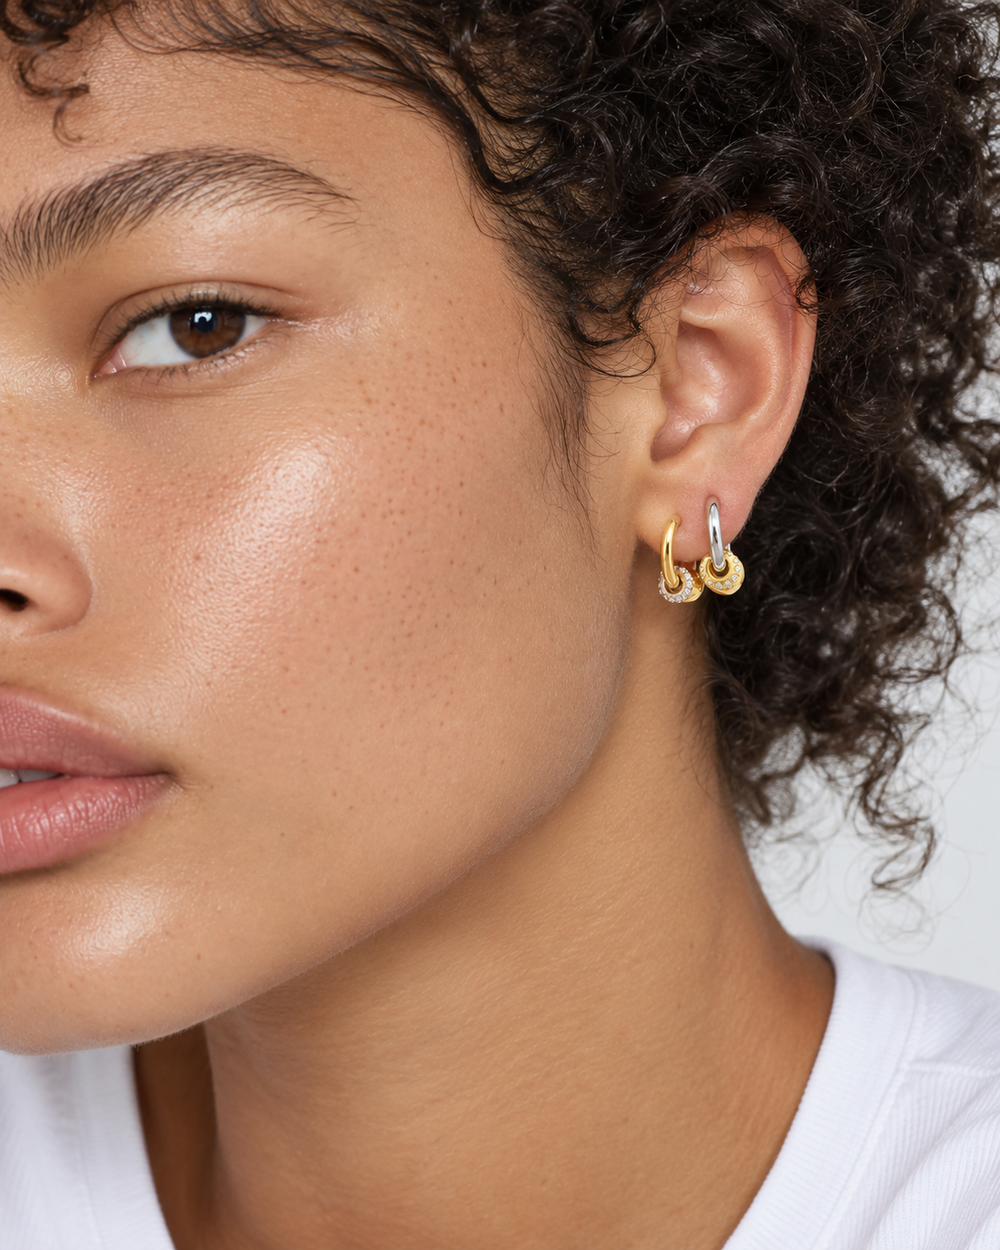
Mixed Metal Kora
Repeat the Kora silhouette in gold and two-tone finishes. This keeps the lobe combination coherent and gives you two metal colours to choose from for an added cuff.
Shop the current pieces
Borrow the balance
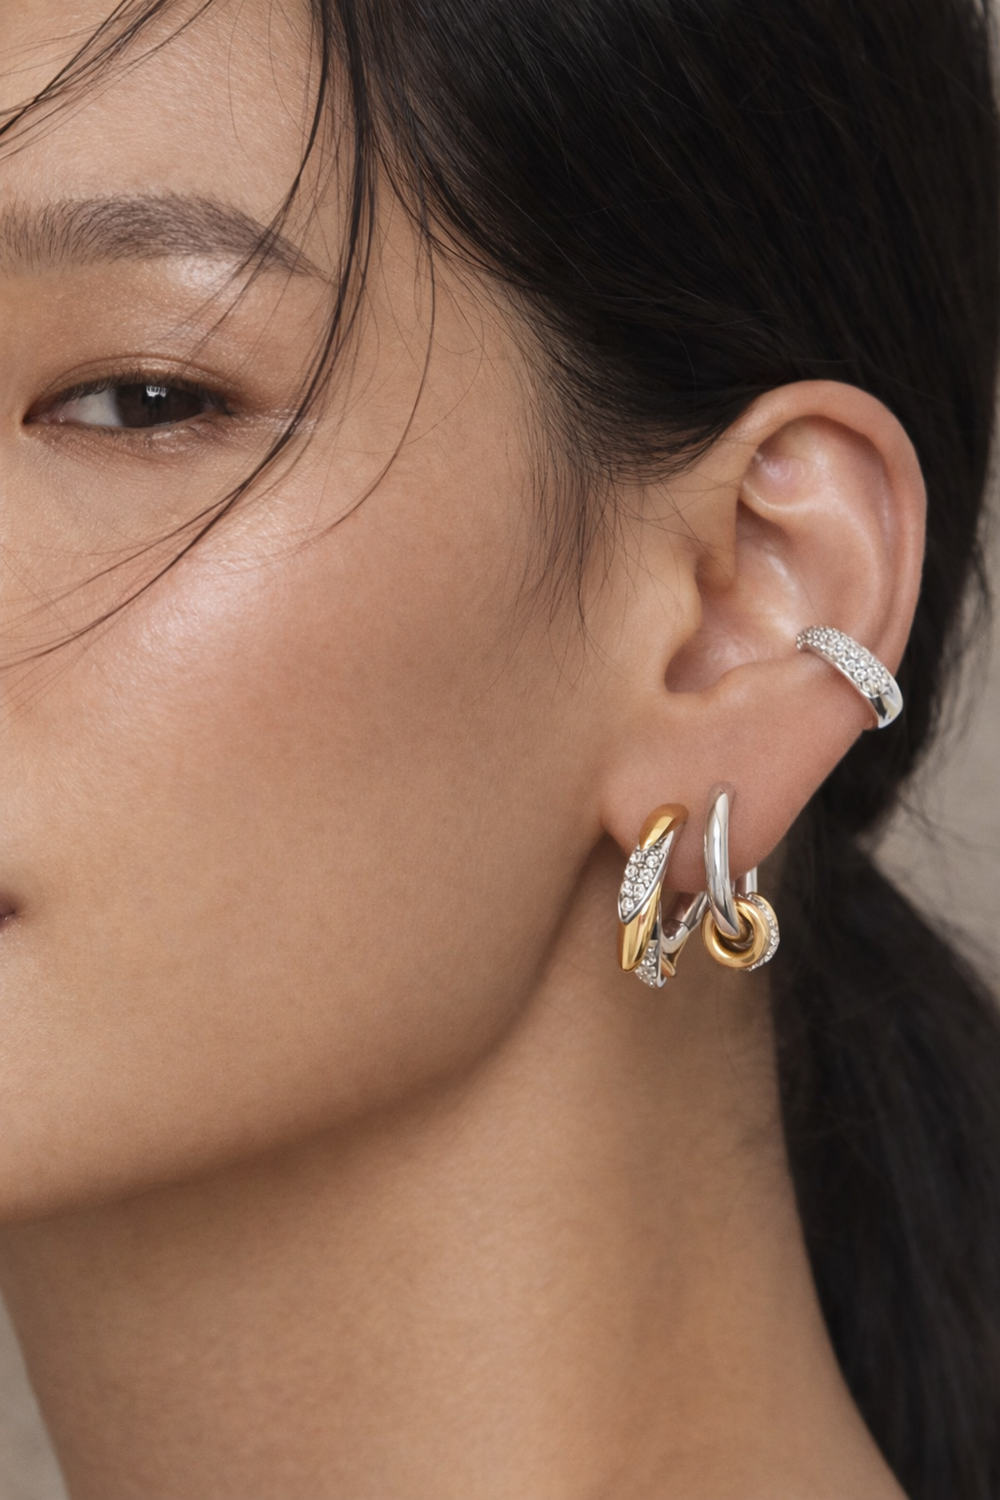
The Elara Mixed Metal Ear Story
Start with Elara’s gold and silver tones, then repeat one finish in a cuff you already own. Keep the upper detail smaller so the sculptural lobe shape remains the focus.
Shop the current pieces
Elara is the currently linked piece; other photographed jewellery is styling inspiration.
The Looks / Three ideas
Keep it cool in silver.
Try polished hoops, a curved line or a small crystal detail. These looks give you a silver-toned starting point for a cuff you already own.
Borrow the balance
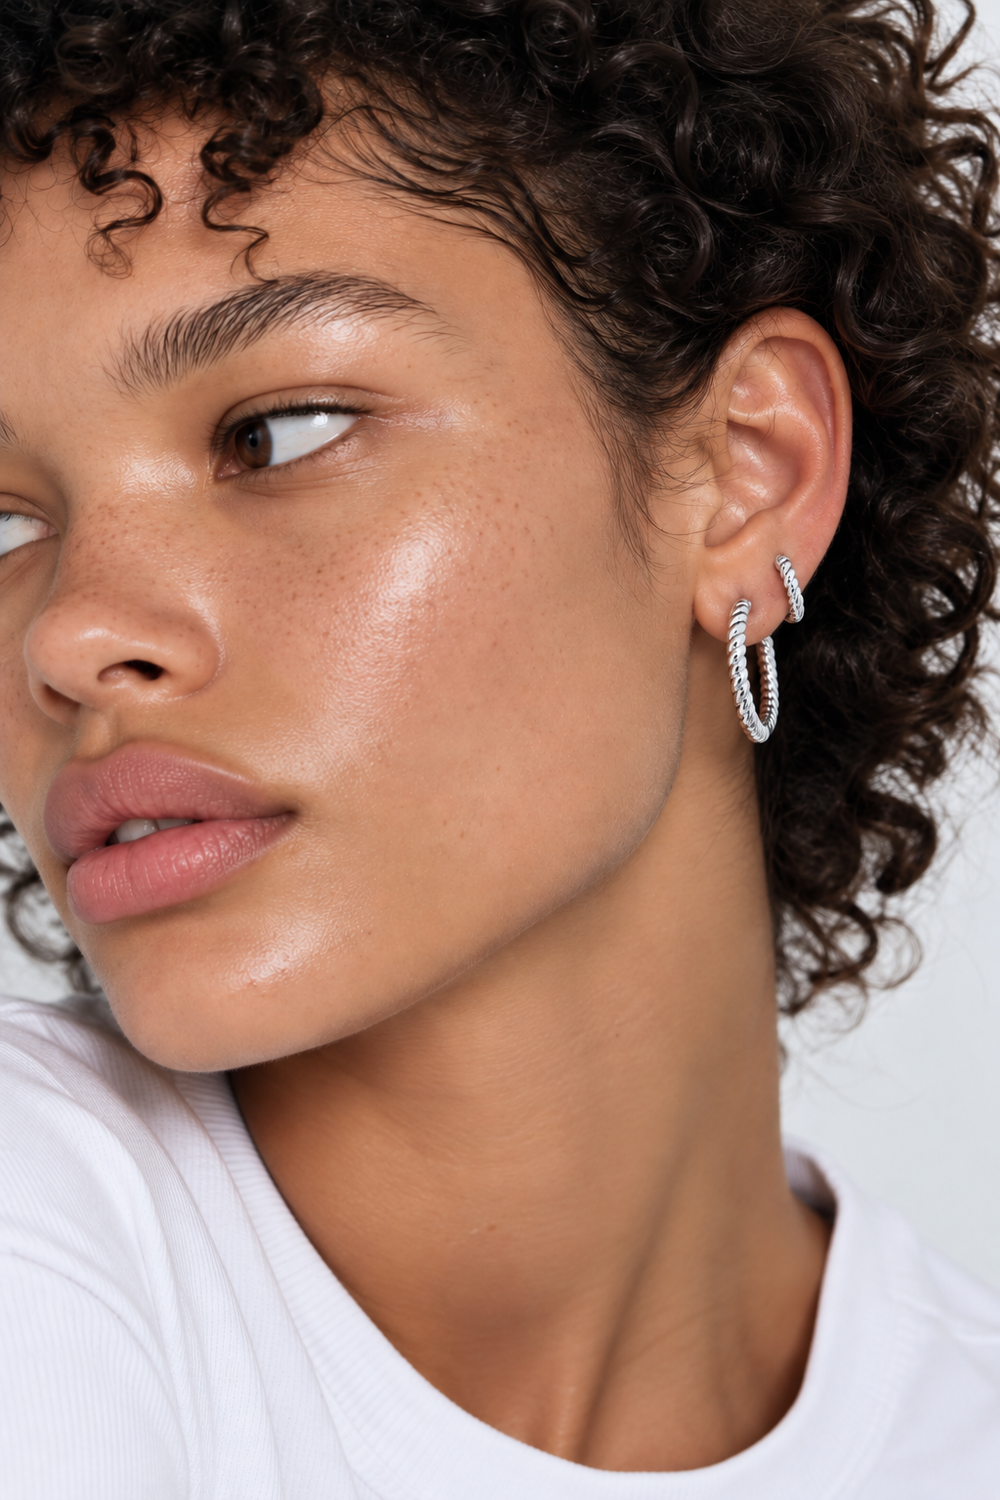
Second Piercing Ideas — Speira Stacked
Use the same Speira design in two sizes for a simple silver lobe stack. Add a cuff only where there is clear space, keeping the two hoop outlines visible.
Shop the current pieces

Borrow the balance
The Odette Lumière Ear Story
Borrow the contrast between a softer lobe shape and a slim crystal detail above. The current Lumière silver stud is a small starting point for your own silver ear story.
Shop the current pieces
Lumière is the currently linked piece. The larger floral earring in the photograph is not included.
Borrow the balance
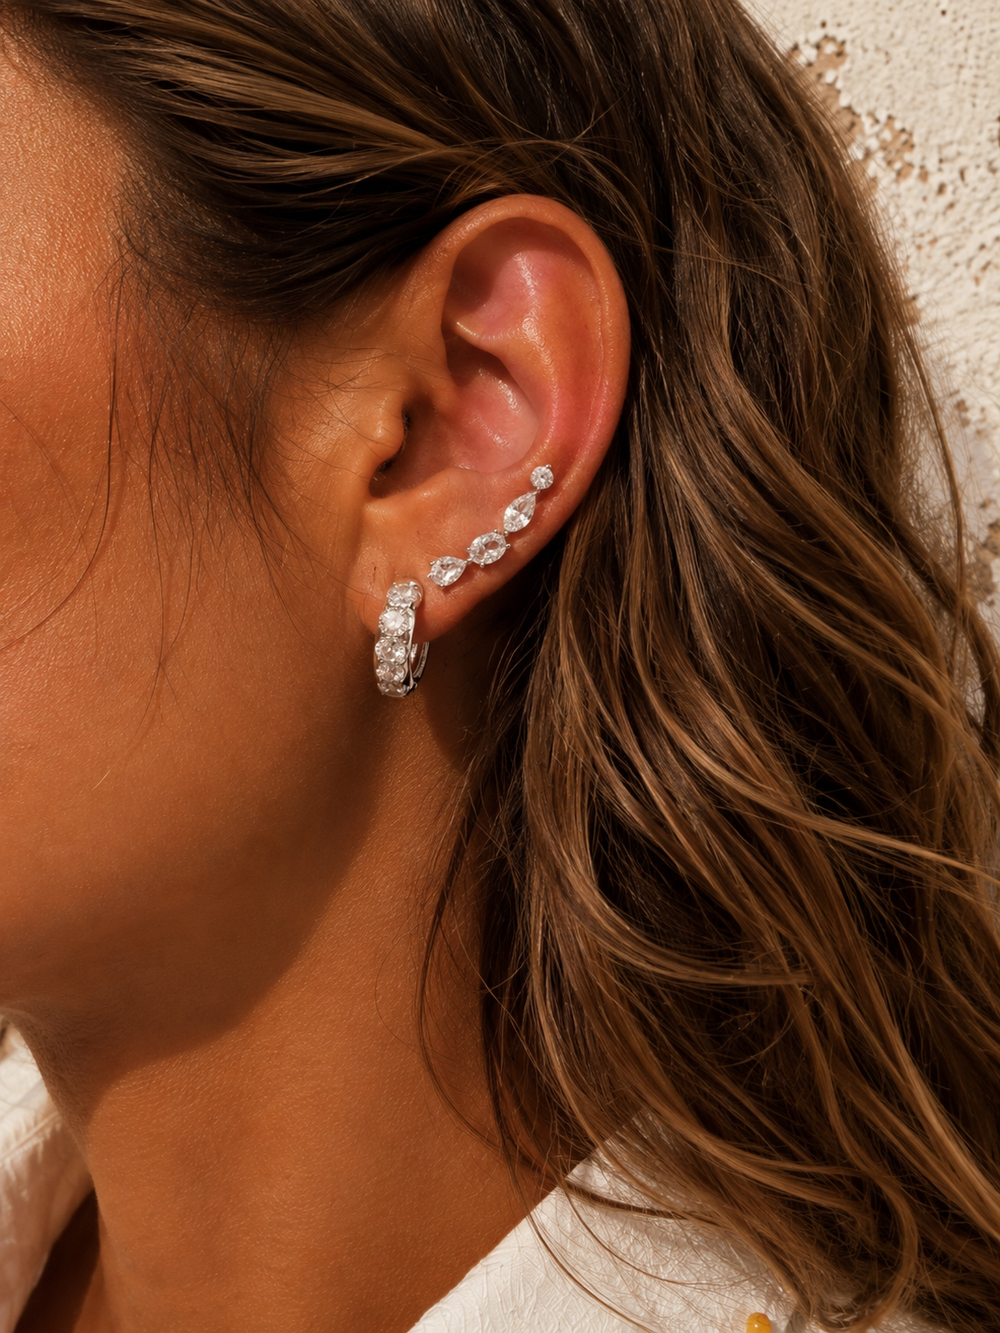
The Daria Riviera Ear Story
Combine Daria with a Riviera ear climber for a longer line along the lobe. You can keep the upper ear bare, or add a small cuff where the pieces have room to sit separately.
Shop the current pieces
Riviera is for pierced ears. Check left/right availability before choosing your side.
The Looks / Three ideas
A little more detail.
Choose the detail you want to notice first: pavé, a linked stud or a moving charm. Keep any added cuff clear of chains and drops.

Borrow the balance
The Pavé Ear Story
Use the photograph as a study in spacing: small bright details separated by areas of bare ear. Couronne is the current piece to build from; keep an added cuff away from the stud.
Shop the current pieces
Couronne is the currently linked item. The other photographed pieces are styling inspiration.

Borrow the balance
The Marquise Ear Story
Repeat pointed stone shapes through the ear, then let Rosie’s linked chain bring movement at the lobe. A cuff should sit clear of the chain and neighbouring studs.
Shop the current pieces
Rosie connects two suitable piercings; the linked studs also require piercings.
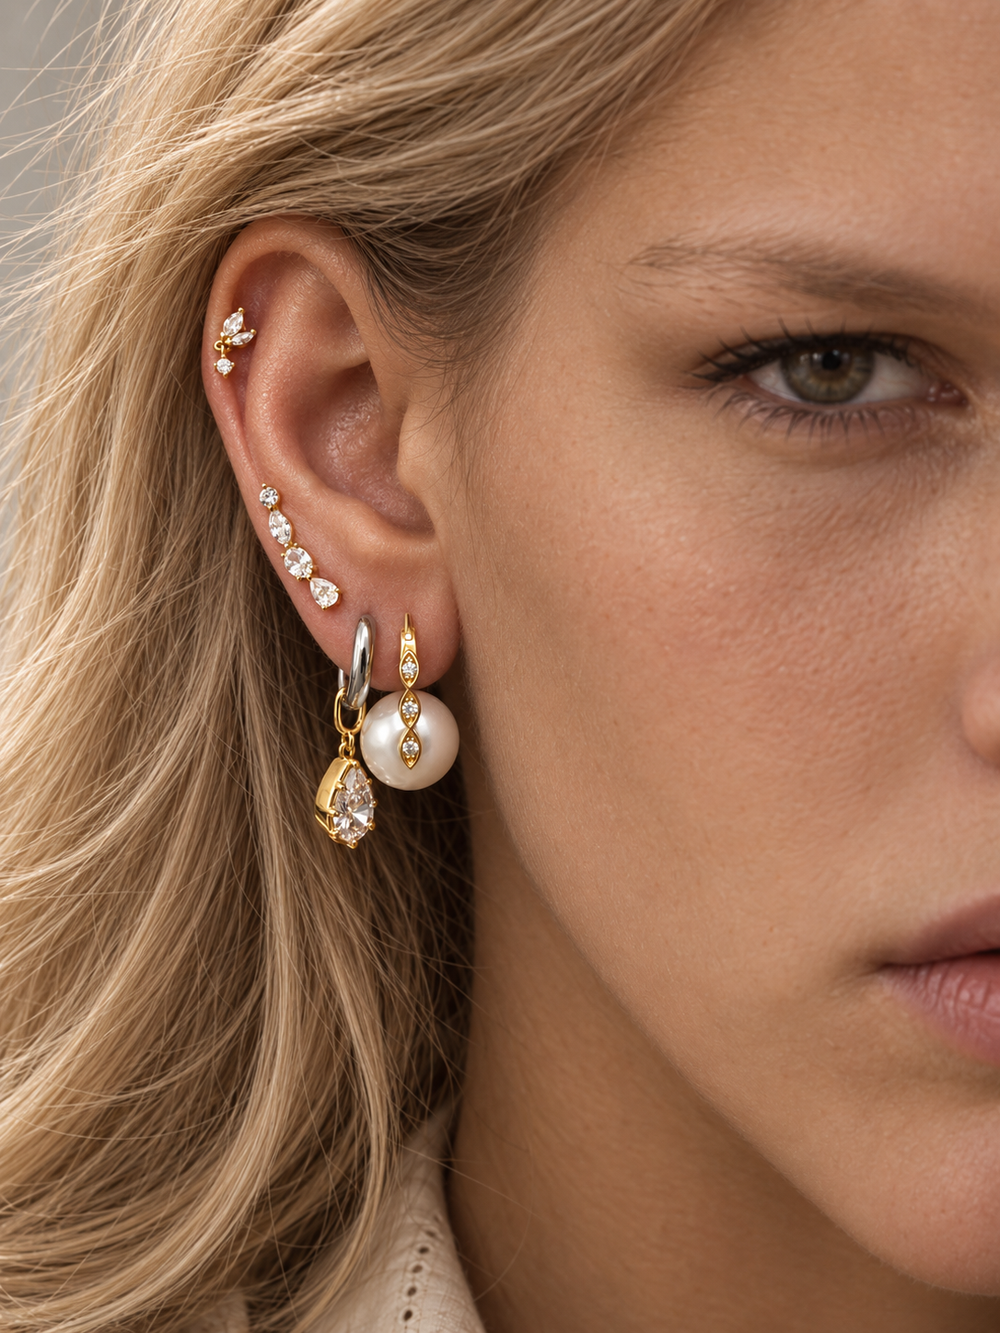
Borrow the balance
The Tasha Pearl & Vittoria Ear Story
Borrow the mix of gold, silver and moving teardrops. The current Vittoria and Papillon pieces let you build a bright, mixed-metal version, with room for a quieter cuff above.
Shop the current pieces
The pearl earring pictured is not among the current linked pieces. One link is a complete huggie-and-charm combination; the separate huggie and charm build an additional earring.
06 / Keep the details in good shape
Materials, comfort
and care.
The metal colour does not tell you the whole construction. Check the base metal, plating, dimensions and fastening on each product page. Gold-toned pieces are not automatically solid gold.
If you know you react to a particular metal, check the full material information before choosing. A hypoallergenic description does not guarantee that every wearer will tolerate a piece; pressure and friction can also make a cuff uncomfortable.
- Put cuffs on after perfume, hairspray and skincare have dried.
- Remove them before sleeping, showering, swimming or exercise.
- Wipe them gently with a soft, dry cloth after wear.
- Store each piece separately to protect the finish and shape.
- Avoid repeated bending, abrasive cleaners and soaking plated jewellery unless the product’s care instructions specifically allow it.
Need help with a fit or fastening? Use our contact page and tell us which piece you are wearing.
07 / Your questions
Ear cuffs,
explained simply.
Do ear cuffs need a piercing?
A no-piercing ear cuff sits around the ear rather than passing through it. Some chain designs also attach to a pierced earring, so check all the components before buying.
Where should an ear cuff sit?
On the part of the outer rim its shape is designed to surround. Some sit higher, others lower around the side of the ear. There is no single position that works for every cuff or every ear.
How do ear cuffs stay on?
Their opening and curved shape fit around part of the ear. Some also have a hinged closure. They need the right fit and position; no cuff is guaranteed never to slip.
Should an ear cuff hurt?
No. If it pinches, aches or leaves your skin irritated, remove it. Do not keep wearing a cuff to make yourself get used to a poor fit.
Can I make an ear cuff tighter?
Only if the product is designed to be adjusted, and only as its instructions allow. Do not bend rigid, stone-set or hinged pieces just because they have an opening.
Can I wear an ear cuff with no earrings at all?
Yes. A single cuff can be the whole look. You can also wear cuffs on both ears if each fits comfortably.
Can I wear a cuff with a new piercing?
Keep cuffs away from a healing piercing so they do not press, rub or catch it. Ask your piercer about suitable jewellery and placement while the piercing heals.
Can I sleep in an ear cuff?
Remove it before sleeping. Pressure from a pillow can make it uncomfortable, bend the piece or dislodge it.
What is the difference between an ear cuff and a clip-on earring?
A cuff generally surrounds part of the outer ear. A clip-on usually fastens onto the lobe with a clip. Both can offer a no-piercing option, but fit and comfort depend on the individual design.
Can anyone wear an ear cuff?
Yes. Choose by the shape, finish and fit you like rather than by a gender label. Check whether the design is made for the left or right ear.
How many ear cuffs should I wear?
Start with one. Add another only if there is room for both to sit separately and comfortably. More pieces do not automatically make a better-balanced ear.
Can I buy every piece shown in these looks?
Not always. Some photographs include older cuffs or other pieces that are no longer listed. Use the current product links and each look page to see the available selection; browse the ear cuffs collection separately for cuffs.
Your ear. Your way.
Start with one detail.
Build from there.
A cuff you love, a hoop you wear on repeat, a new stud beside it. Find a comfortable fit and let the rest follow.
Read next: the huggie size and fit guide · the gold studs guide · the gold hoops guide.


